
Custom domains with Aspire
Recently a member of the Aspire discord asked about support for configuring custom domains on Azure Container App instances. The ability to configure custom domains is currently an experimental feature in Aspire and its usage can be a little tricky.
The problem isn't entirely Aspire's fault - configuring custom domains in Azure, and Azure Container Apps specifically is a bit of a chicken-and-egg problem which is difficult to fully automate due to domain ownership/control verification requirements.
In this post I'll walk you through the process of deploying the Aspire starter template to Azure Container Apps using azd (Azure Developer CLI) where the front-end is exposed via a custom domain. Initially we'll get it deploying from the developer workstation then we'll lift that deployment process into GitHub Actions, and finally we'll move to a multi-environment deployment model with a dev, test, and production environments.
Prerequisites
To get this working you are going to need to have access to an Azure subscription in which to deploy resources and control of a public DNS domain that you want to map to the container app resources you deploy. You will need the ability to update DNS records as part of this process.
Additionally, you will want to have access to the Aspire CLI, the Azure CLI, the Azure Developer CLI, and the GitHub CLI. Follow the instructions on those linked pages to set them up on your machine.
Phase 1: Workstation to cloud deployment
The first phase is all about setting up the code locally so that you are able to deploy from your local workstation to the cloud.
Creating the repository with gh repo create
The first thing that we need to do is get our repository setup. I like to setup my repository in GitHub up front from a template that has my .gitignore and a few other things already in place. In this case I'm going to use the dotnet/aspire-devcontainer repository as a template using the following GitHub CLI command (substitute your org and repository name as appropriate):
gh repo create `
  with-aspire/custom-domain-with-aspire `
  --template dotnet/aspire-devcontainer `
  --private `
  --clone
GitHub CLI command to create a new repo based on a template and clone it locally.
This will pull down a repository that has the following files:
.devcontainer/
    devcontainer.json
.gitignore
CODE_OF_CONDUCT.md
LICENSE
README.md
SECURITY.md
List of files created from template.
Now is a good time to review and/or remove any files that you don't want but I'd recommend leave at least the .gitignore file and the devcontainer.json file since they can make working with the repo a little bit easier.
Creating the Aspire project with aspire new and aspire add
The next thing that we want to do is create the Aspire project. To do this we are going to use the Aspire CLI and use the starter template which includes a few services. Run the aspire new command and select the following options:
- Template:
Starter template - Project name:
CustomDomainWithAspire(its up to you what you choose here) - Output path:
src(this is just my preference) - Use Redis Cache:
No(just to save some deployment time) - Create a test project:
No(this is the default, and I test in production!) - Version:
9.4.1(... or whatever the newest version is)
The next thing that we need to do is add the Azure Container Apps integration package to the app-host. You can deploy an Aspire application without doing this but because we want to configure a custom domain on the container app resources that will get deployed to Azure we want to use the extensibility points that the hosting integration package provides. Run the aspire add command and add the following integration package:
- Integration:
Aspire.Hosting.Azure.AppContainersorazure-appcontainers - Version:
9.4.1or whichever is latest
Now that is done we've got everything we need to customize the container app and configure a custom domain.
Configuring custom domains in the app-host
There are a few changes that we need to make to the app-host. The first is that we need to declare two parameters which capture the details of the custom domain and the certificate name that will be associated with the endpoint that is exposed to the Internet when the Aspire-app is deployed.
Underneath the the call to CreateBuilder(...) in the AppHost.cs file declare the following parameters:
var builder = DistributedApplication.CreateBuilder(args);

var customDomain = builder.AddParameter("customDomain");
var certificateName = builder.AddParameter("certificateName", value: "", publishAsDefaultValue: true);
Code declaring parameters for certificate and domain name.
You'll notice that the declaration for the certificateName parameter is a bit more involved. The reason why for this will become apparent a little bit later on. For now, let's keep going.
The second change that needs to be made is that we need to add an environment resource to the app model which teaches Aspire how to support customized deployments to Azure Container Apps. After the parameter declarations add a call to AddAzureContainerAppsEnvironment(...) call:
var builder = DistributedApplication.CreateBuilder(args);

var customDomain = builder.AddParameter("customDomain");
var certificateName = builder.AddParameter("certificateName", value: "", publishAsDefaultValue: true);

builder.AddAzureContainerAppsEnvironment("env");
Code adding ACA environment to app-model.
Now that we have the container app environment added to the model we can customize the specific container app. In this case the container app is actually a .NET project which is a Blazor front-end but it will work with any resource that deploys as a container that exposes a HTTP endpoint.
The PublishAsAzureContainerApp(...) extension method is chained onto resource declarations and provides a callback that can be used to modify various aspects of the container app resource (e.g. scaling, sizing etc). In the case of custom domain support, we have added the ConfigureCustomDomain(...) helper method which references the two parameters declared above.
Here is the complete code listing for AppHost.cs:
#pragma warning disable ASPIREACADOMAINS001

var builder = DistributedApplication.CreateBuilder(args);

var customDomain = builder.AddParameter("customDomain");
var certificateName = builder.AddParameter("certificateName", value: "", publishValueAsDefault: true);

builder.AddAzureContainerAppEnvironment("env");

var apiService = builder.AddProject<Projects.CustomDomainWithAspire_ApiService>("apiservice")
    .WithHttpHealthCheck("/health");

builder.AddProject<Projects.CustomDomainWithAspire_Web>("webfrontend")
    .WithExternalHttpEndpoints()
    .WithHttpHealthCheck("/health")
    .WithReference(apiService)
    .WaitFor(apiService)
    .PublishAsAzureContainerApp((infra, app) =>
    {
        app.ConfigureCustomDomain(customDomain, certificateName);
    });

builder.Build().Run();
Complete AppHost.cs code listing.
ConfigureCustomDomain(...) method is in preview. We hope to remove this warning at some point in the near future.These are all of the changes that we will need to make to the AppHost.cs file itself for the purposes of this walkthrough. Everything else from this point forward is really just dealing with environment specific configuration.
First deployment with azd init and azd up
Now is probably a good time to commit your source files to the Git repository. If you used the repository template mentioned above the .gitignore file should already be ignoring any files that we don't want so you can just add everything to source control - if you didn't use that template, then you'll want to make sure you exclude any temporary build artifacts that may have been produced.
git add .
git commit -m "Basic apphost with custom domain support."
Commit files to the git repository.
Now that we've got that baseline it'll be easy to spot the changes that using azd makes to the repository when we go to deploy for the first time. The first thing that we need to do is run azd init so that it can detect our Aspire-based app and drop down some configuration files that will be useful for triggering deployments to the cloud from our local workstation. Run azd init and answer the prompts as follows:
- How do you want to initialize?
Scan current directory - Confirm path to app-host and press enter.
- Enter a unique environment name:
myapplocal(or whatever you prefer)
Once you've confirmed these values azd init will drop down a few files into your repository. Specifically, the following files will have been added:
.azure/
    myapplocal/
        .env (added)
        config.json (added)
    .gitignore (added)
    config.json (added)
.gitignore (updated)
azure.yaml (added)
next-steps.md (added)
List of files added or updated by azd init.
Of these files, the only files that we are going to add to the repository are the last three (the updated .gitignore, azure.yaml, and next-steps.md). The files under the .azure directory should not be committed (go ahead and commit the other three files now).
We are now ready to deploy the Aspire app-host for the first time. However, be warned - you should expect this deployment to fail! Go ahead and run the azd up command. This command runs the app-host in "publish mode" and gets it to generate a manifest that azd uses to figure out what resources are part of the app model and whether there is any custom Bicep used to deploy Azure resources.
As part of this process, you will be prompted a few times to provide values:
- Azure subscription: (choose one that you own)
- Custom domain:
myapplocal.withaspire.dev(the FQDN you want to use as a custom domain) - Location:
West US 3(or whichever region you want)
Once you have answered all the questions azd will start provisioning the underlying Azure resources required to support the container app including the container registry, the log analytics workspace and the container app environment. It will then move onto deploying the container apps themselves - first the apiservice and then the webfrontend. When it gets to the webfrontend the deployment will fail! The error will look something like this:
ERROR: error executing step command 'deploy --all': failed deploying service 'webfrontend': deploying bicep template: deploying to resource group:

Deployment Error Details:
InvalidCustomHostNameValidation: A TXT record pointing from asuid.myapplocal.withaspire.dev to C640C1D541CEDBEC7FF92E534EBC9D47F28FA2B801476FC06799A76A96807F3C was not found.

TraceID: b1a9339cbbfc091e372383712365204e
Error showing deployment failure because of missing TXT record.
The reason for the deployment failure is that in order to bind a custom domain to a container app, Azure needs to verify that you have ownership of a domain before configuring an endpoint to use it.
To verify ownership, you as the domain owner need to add a TXT record to the zone file with the name asuid.<fqdn you chose previously> with a value of the hexadecimal string that is shown in the error. This process is normally done through the Azure Portal, but because the information is here in the error message we don't need to go to the portal (yet!).
Go ahead and update your DNS with the TXT record as described in the error message that you are seeing locally. You domain and value will differ obviously.
TXT record to your DNS provider make sure you understand whether the DNS provider expects you to enter just asuid.myapplocal (example) or asuid.myapplocal.withaspire.dev (again, example) - some DNS providers differ in whether they expect fully qualified or scoped names when providing TXT records.TXT record value. I've been caught out wondering why subsequent deployments failed only to find out I copied a little bit too much into the clipboard!Now that the DNS record is updated you can try doing the deployment again!
Second and third time is a charm!
You can trigger the deployment again simply by doing azd up again, but if you want to speed things up a little you can deploy just the webfrontend using the azd deploy webfrontend command. This time the deployment should succeed.
Even though we deployed successfully the custom domain name still isn't mapped to our container app. This is because we need to tell Azure Container Apps to create a managed certificate for us (or upload our own). To do this we need the CNAME record created which points from our selected FQDN to the randomly generated hostname by Azure Container Apps when the container app was deployed.
Take note the hostname in the URL of the webfrontend resource. It will be something like webfrontend.words-numbers.azureregion.azurecontainerapps.io. In the example I am using I am pointing myapplocal.withaspire.dev to webfrontend.gentlewater-98804c98.westus3.azurecontainerapps.io at my DNS hosting provider with CNAME record.
After the DNS records are created, we can trigger the issuance of a managed certificate using the Azure CLI with the following command (you'll need to refer to the names of your resource group and container app environment that was created when doing the initial deployment):
az containerapp env certificate create `
    --name env4cvc32i5jm2aq
    --resource-group rg-myapplocal
    --validation-method CNAME
    --hostname myapplocal.withaspire.dev
Azure CLI command to create managed certificate.
When this command runs - assuming your DNS is set up correctly, it will output a blob of JSON to the console, here is an example:
{
  "id": "/subscriptions/5837e1bd-9167-4d3e-aed9-a8ec3da5f873/resourceGroups/rg-myapplocal/providers/Microsoft.App/managedEnvironments/env4cvc32i5jm2aq/managedCertificates/mc-rg-myapplocal-myapplocal-witha-0377",
  "location": "West US 3",
  "name": "mc-rg-myapplocal-myapplocal-witha-0377",
  "properties": {
    "domainControlValidation": "CNAME",
    "provisioningState": "Pending",
    "subjectName": "myapplocal.withaspire.dev",
    "validationMethod": "CNAME"
  },
  "resourceGroup": "rg-myapplocal",
  "systemData": {
    "createdAt": "2025-08-18T10:08:51.4858924Z",
    "createdBy": "mitch@mitchdenny.dev",
    "createdByType": "User",
    "lastModifiedAt": "2025-08-18T10:08:51.4858924Z",
    "lastModifiedBy": "mitch@mitchdenny.dev",
    "lastModifiedByType": "User"
  },
  "type": "Microsoft.App/managedEnvironments/managedCertificates"
}
JSON output from managed certificate creation invocation
In the background Azure is now generating a certificate and binding it the container app endpoints for the domain name that was specified on the command-line. In order to complete the loop on the Aspire side of things we need to capture the name value out of the JSON blob and put it into the .azure/myapplocal/.env file for the AZURE_CERTIFICATE_NAME entry. Here is what that file looks like in my environment (all these values will be specific to your environment):
AZURE_CERTIFICATE_NAME="mc-rg-myapplocal-myapplocal-witha-0377"
AZURE_CONTAINER_APPS_ENVIRONMENT_DEFAULT_DOMAIN="gentlewater-98804c98.westus3.azurecontainerapps.io"
AZURE_CONTAINER_REGISTRY_ENDPOINT="envacr4cvc32i5jm2aq.azurecr.io"
AZURE_ENV_NAME="myapplocal"
AZURE_LOCATION="westus3"
AZURE_SUBSCRIPTION_ID="5837e1bd-9167-4d3e-aed9-a8ec3da5f873"
ENV_AZURE_CONTAINER_APPS_ENVIRONMENT_DEFAULT_DOMAIN="gentlewater-98804c98.westus3.azurecontainerapps.io"
ENV_AZURE_CONTAINER_APPS_ENVIRONMENT_ID="/subscriptions/5837e1bd-9167-4d3e-aed9-a8ec3da5f873/resourceGroups/rg-myapplocal/providers/Microsoft.App/managedEnvironments/env4cvc32i5jm2aq"
ENV_AZURE_CONTAINER_REGISTRY_ENDPOINT="envacr4cvc32i5jm2aq.azurecr.io"
ENV_AZURE_CONTAINER_REGISTRY_MANAGED_IDENTITY_ID="/subscriptions/5837e1bd-9167-4d3e-aed9-a8ec3da5f873/resourceGroups/rg-myapplocal/providers/Microsoft.ManagedIdentity/userAssignedIdentities/env_mi-4cvc32i5jm2aq"
.env file can contain secrets so you generally shouldn't share it like I have here, however in my case I know that none of these values are particularly sensitive.Now that the certificate is created (or being created) and we've got our hands on the managed certificate name its time to do one more final deployment. This final deployment will associate the certificate that we've just manually created with the custom domain that is bound to the container app - its also a great way of verifying that future deployments won't result in the container app breaking because we've accidentally disassociated the certificate from the endpoint.
Once again, we just need to deploy the webfrontend using the azd deploy webfrontend command. Assuming the command completes successfully the website should now be available on the custom domain:
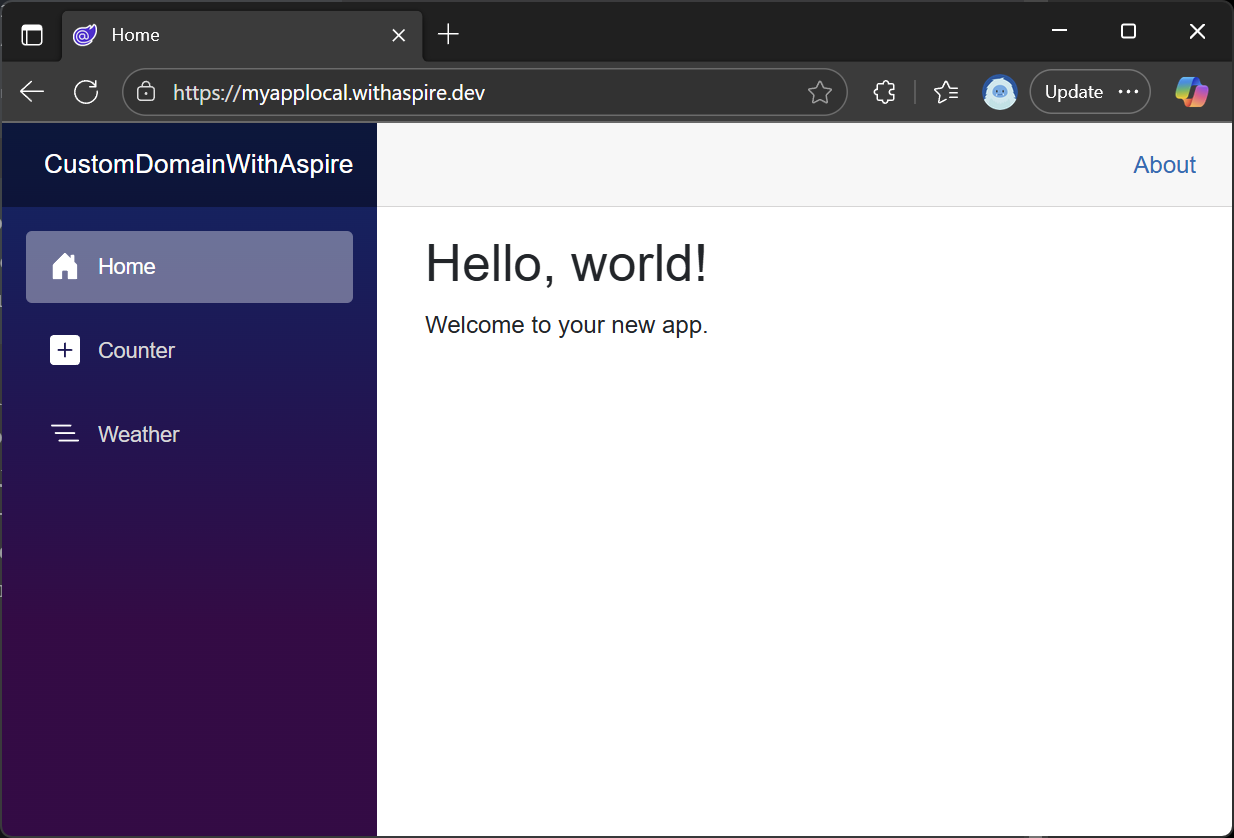
Hooray! We've got the app up and running. But there is a saying in this business that "friends don't let friends right-click and deploy". To be honest, all we've done here is do right-click and deploy with a lot more words - the next step is to hook this deployment process up to GitHub Actions so that the app can deployed every time someone merges changes into main.
Phase 2: GitHub Actions to cloud
Fortunately for us the Azure SDK team has taken some of the leg work out of lifting the deployment setup we have working locally into our GitHub repository. This is where we use the Azure Developer CLI again to configure our GitHub Actions workflows.
When we run the azd pipeline config command we get asked a series of questions about how we want to configure our pipeline. This tutorial is going to focus on GitHub Actions and just one way of controlling access to Azure's cloud resources from build agents. If you go another route there will be similar things that you need to do but obviously there will be subtle differences.
Without further ado run azd pipeline config and when prompted provide the following values:
- Provider:
GitHub - Add workflow:
Yes - Authentication:
Federated User Managed Identity - Select:
Create new User Managed Identity - Location:
West US 3(this is for the User Managed Identity!) - Resource group, select:
Create a new resource group - Resource group name:
rg-myappshared - Push local changes and start pipeline:
Yes
Assuming is setup correctly your application should have just been deployed (again) and should still be functional.
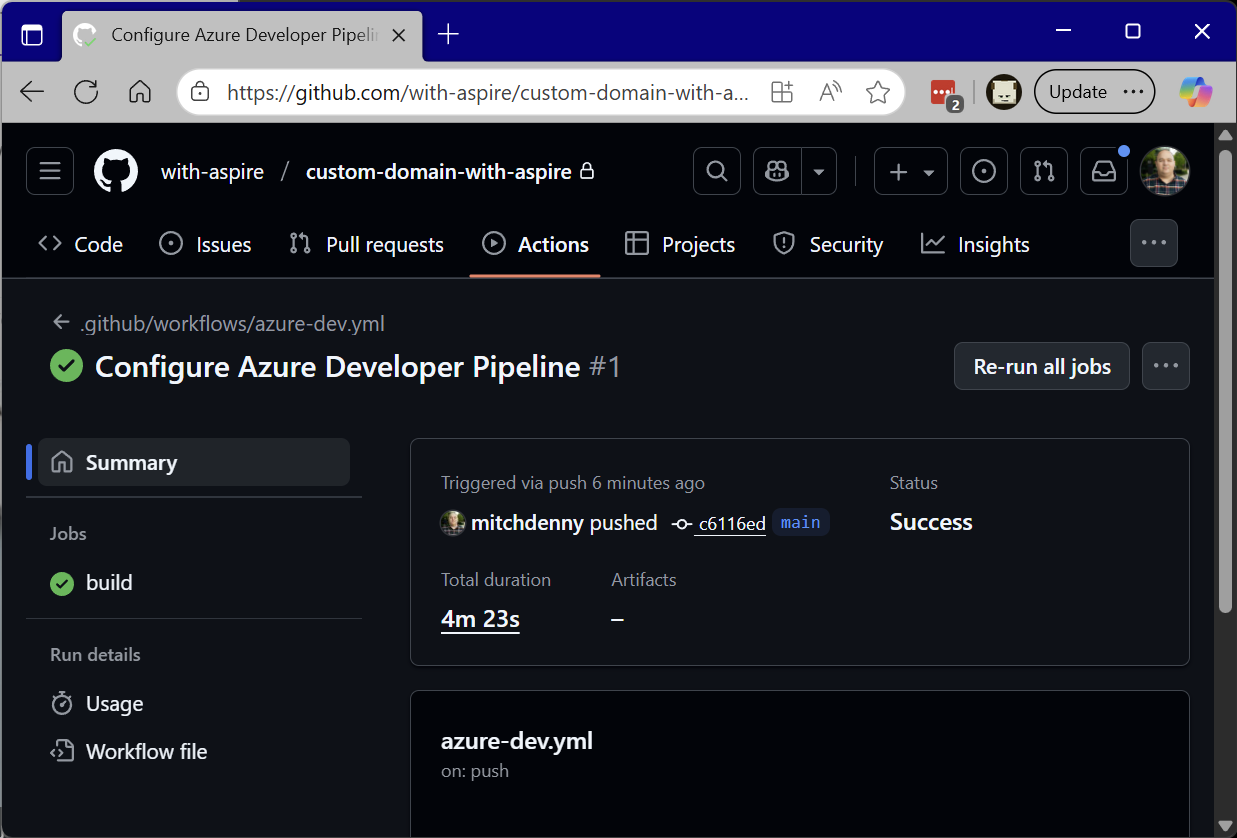
It is worth exploring what just happened here. First the azd pipeline config command created an azure-dev.yml file which is a GitHub Actions workflow. The workflow contains a single job called build which pulls down the source code, logs into Azure using the user managed identity (more on this later) and then executes azd provision --no-prompt and azd deploy --no-prompt.
The authentication piece is particularly interesting. Instead of using a service principal where you need to manually supply a client ID and a client secret it is making use of a feature of Microsoft Entra and Azure called Workload Identity.
Workload Identity allows trusted service providers such as GitHub to request tokens for particular purposes. Automations that run within GitHub Actions workflows can then use those tokens to automate operations in the cloud such as deploying Azure resources and uploading container images.
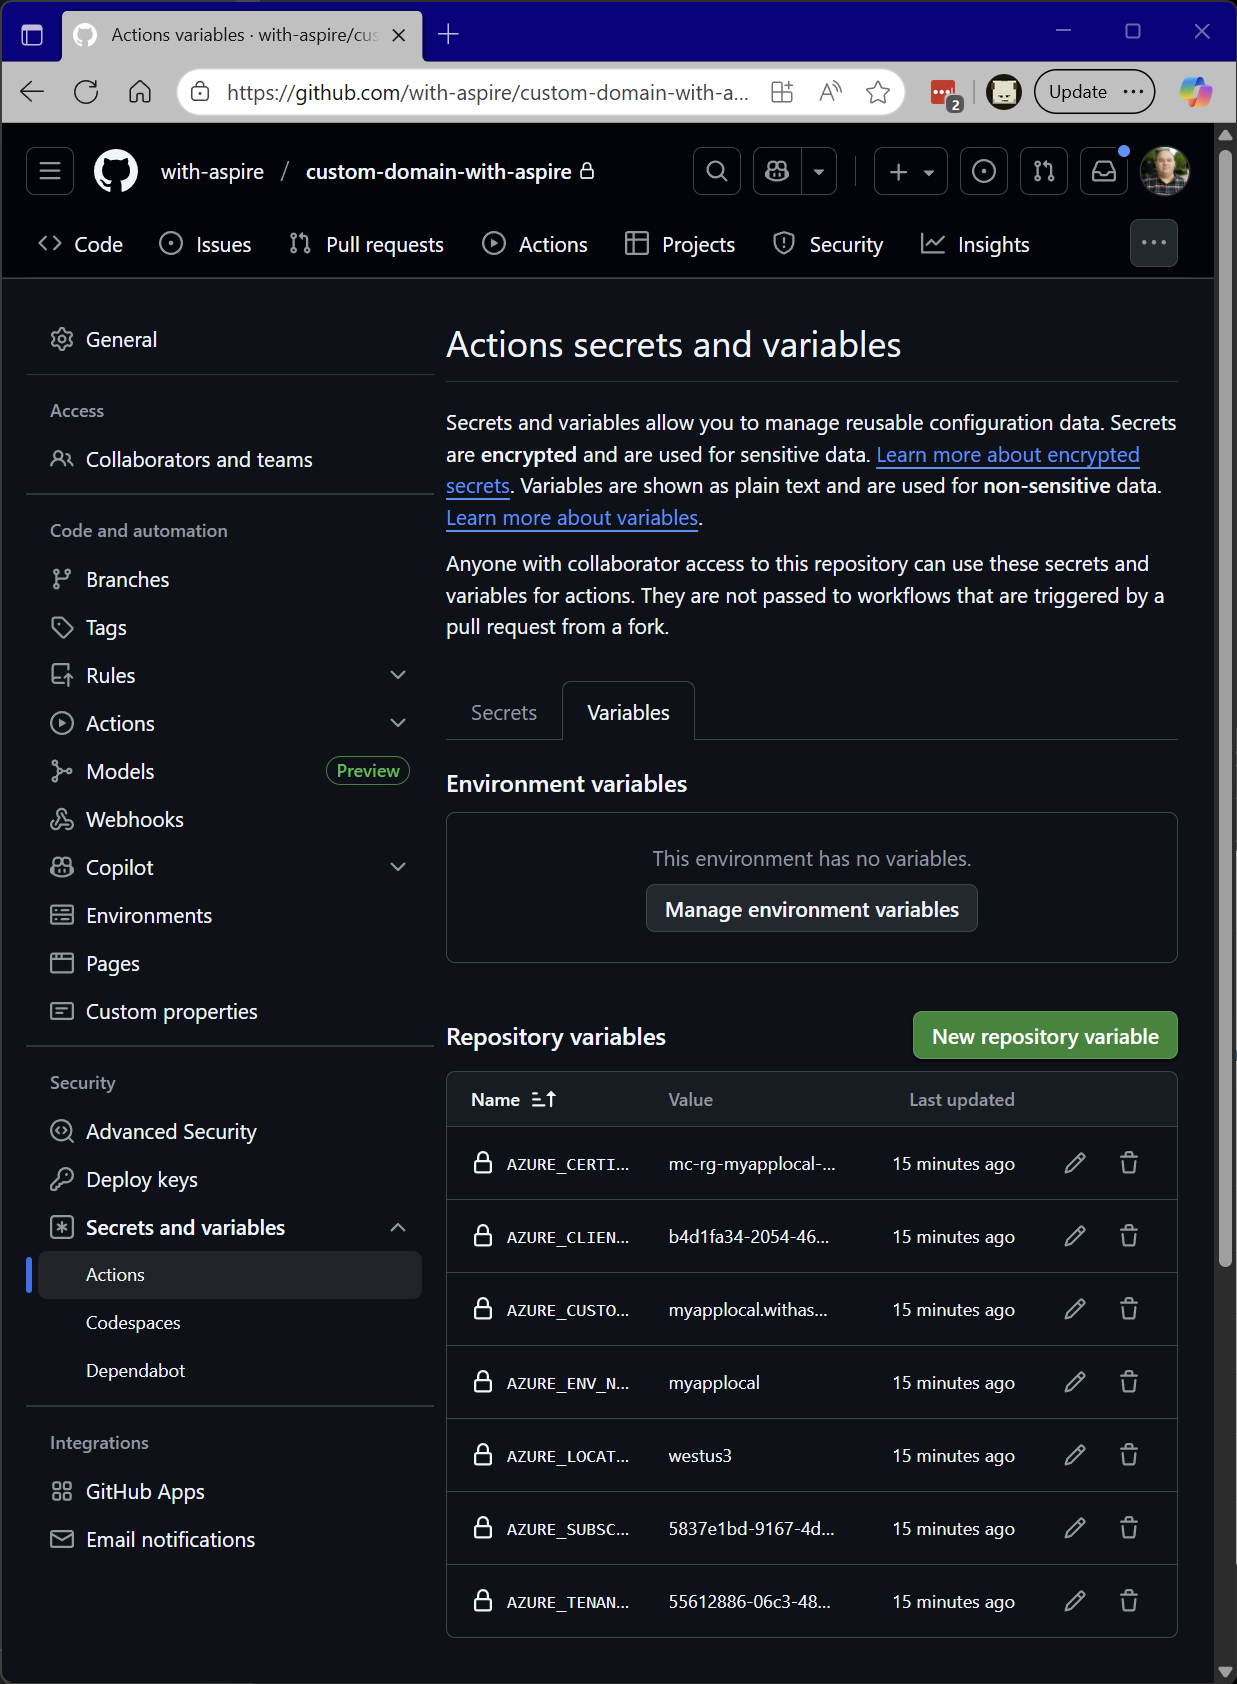
All of the configuration options that were previously in the .azure folder on your local workstation were hoisted into the GitHub repository as variables which are now accessible to the GitHub workflow.
In the future, when a developer merges a change into the main branch of the repository the azure-dev workflow will trigger and the Aspire application will be deployed to the cloud.
We could leave things here, but many development teams prefer to deploy their code to development and test environments before deploying to production. In order to achieve this, we need to roll up our sleeves and hack away at some of the generated YAML to support a multi-environment workflow.
Phase 3: Multi-environment deployments
If we wanted to deploy to multiple environments we could just copy and paste the workflow a few times and set up manual workflow triggers to deploy the code into different environments whenever we wanted - however GitHub has a much better option - environments!
An environment is just an isolated collection of variables and secrets. When a workflow job runs it can run within an environment and when it does so it gets access to the set of variables and secrets that are unique to that environment.
You can see how this could be useful. You could define a development, test, and production environment each with their own custom domain and other configuration values.
In this phase we are going to configure three of these unique environments and show how you can chain deployments from one to the other.
Environment preparation
Standing up a new environment is not dissimilar to the preparation work that we did to provision our first environment. We need to create some DNS entries (TXT and CNAME entries), we need to create a managed certificate, and we need to create the environments themselves in GitHub and make sure that we have the correct set of environment variables in each one.
The first thing we are going to do is create the GitHub environments. There isn't a dedicated command for this, but you can do it at the following URL:
https://github.com/[org]/[repo]/settings/environmentsURL to UI in GitHub which shows list of environments.
However, to streamline the process a bit you can use the GitHub CLIs ability to execute arbitrary calls against the GitHub REST API to achieve the same thing.
# Create production environment in GitHub
gh api `
  --method PUT `
  -H "Accept: application/vnd.github+json" `
  "/repos/with-aspire/custom-domain-with-aspire/environments/production"

# Create test environment in GitHub
gh api `
  --method PUT `
  -H "Accept: application/vnd.github+json" `
  "/repos/with-aspire/custom-domain-with-aspire/environments/test"

# Create development environment in GitHub
gh api `
  --method PUT `
  -H "Accept: application/vnd.github+json" `
  "/repos/with-aspire/custom-domain-with-aspire/environments/development"
GitHub CLI commands to create development, test, and production environments.
Each one of these commands should return a JSON payload, but you can execute a GET operation against the API afterwards just to verify that they were created successfully.
# Gets details of environments associated with repository.
gh api `
  --method GET `
  -H "Accept: application/vnd.github+json" `
  "/repos/with-aspire/custom-domain-with-aspire/environments"
GitHub CLI command list environments.
Earlier when we ran azd pipeline config the Azure Developer CLI created a bunch of environment variables globally within the repository. Now that we are moving to environment-based deployments some of these need to be moved to environment scoped variables and removed from the repository scope.
Here is a summary of what we need to do:
AZURE_CERTIFICATE_NAME: remove, will be added in later per environment.AZURE_CLIENT_ID: keep at repository level.AZURE_CUSTOM_DOMAIN: remove and recreate in each environment.AZURE_ENV_NAME: remove and recreate in each environment.AZURE_LOCATION: keep at repository level.AZURE_SUBSCRIPTION_ID: keep at repository level.AZURE_TENANT_ID: keep at repository level
AZURE_CLIENT_ID, AZURE_SUBSCRIPTION_ID, and AZURE_TENANT_ID can also be done per environment and it is a good practice to isolate identities, subscriptions, and sometimes even tenants for different environments, but for the sake of simplicity I am leaving that as a future exercise to the reader.Rather than manually going through each environment deleting and re-adding each of these values, you can once again use the GitHub CLI to streamline the process.
The following commands will delete all of the variables from the repository scope that we wanted to get rid of (AZURE_CERTIFICATE_NAME, AZURE_CUSTOM_DOMAIN, and AZURE_ENV_NAME).
# Delete repository scoped environment variables.
gh variable delete `
    AZURE_CERTIFICATE_NAME `
    --repo with-aspire/custom-domain-with-aspire

gh variable delete `
    AZURE_CUSTOM_DOMAIN `
    --repo with-aspire/custom-domain-with-aspire

gh variable delete `
    AZURE_ENV_NAME `
    --repo with-aspire/custom-domain-with-aspire
Using GitHub CLI to remove variables from repo scope.
Once these variables are removed from the repository scope, we need to add the AZURE_CUSTOM_DOMAIN and AZURE_ENV_NAME variables back into each of the environments that we created earlier.
# Set unique custom domains in each environment.
gh variable set `
    AZURE_CUSTOM_DOMAIN `
    --env production `
    --body "myappprod.withaspire.dev" `
    --repo with-aspire/custom-domain-with-aspire

gh variable set `
    AZURE_CUSTOM_DOMAIN `
    --env test `
    --body "myapptest.withaspire.dev" `
    --repo with-aspire/custom-domain-with-aspire

gh variable set `
    AZURE_CUSTOM_DOMAIN `
    --env development `
    --body "myappdev.withaspire.dev" `
    --repo with-aspire/custom-domain-with-aspire

# Set AZD environment name for each environment.
gh variable set `
    AZURE_ENV_NAME `
    --env production `
    --body "production" `
    --repo with-aspire/custom-domain-with-aspire

gh variable set `
    AZURE_ENV_NAME `
    --env test `
    --body "test" `
    --repo with-aspire/custom-domain-with-aspire

gh variable set `
    AZURE_ENV_NAME `
    --env development `
    --body "development" `
    --repo with-aspire/custom-domain-with-aspire
Using GitHub CLI to add variables to environment scope.
AZURE_CERTIFICATE_NAME variables back into the environments. This was intentional because we don't know what those certificate names are yet. We will need to deploy the environments once initially so that the container app environments and container apps exist and then manually create the managed certificates and then update the environment variables.Now that the environments in GitHub are configured, we need to adjust the user managed identity that was created when the az pipeline config command was first run.
Granting user managed identity environment credentials
The user managed identity that was created in the process above was placed into the rg-myappshared resource group. This was very intentional because in this scenario we are going to use this same identity to drive the deployments into each environment and if we add and remove environments in the future the identity should be isolated from environment specific resource groups.
In more locked down environments, you might have a user managed identity for every environment to control the blast radius if one leg of your deployment pipeline was compromised - this is something that you can look into if you want to take that extra step for the sake of security (it's not a bad idea!).
The name of the user managed identity was msi-custom-domain-with-aspire which was derived by azd pipeline config from the name of the repository. When we make the switch from the basic pipeline generated by azd to a multi-environment one we need to grant the user assigned identity additional rights.
By default, the user assigned identity is configured to issue tokens when jobs run on builds triggered on commits to main or when a pull request kicks-off. Instead, we want to add credentials which are specific for each environment.
# Created federated credential for production
az identity federated-credential create `
    --identity-name msi-custom-domain-with-aspire `
    --resource-group rg-myappshared `
    --issuer https://token.actions.githubusercontent.com `
    --audience "api://AzureADTokenExchange" `
    --subject "repo:with-aspire/custom-domain-with-aspire:environment:production" `
    --name production

# Created federated credential for test
az identity federated-credential create `
    --identity-name msi-custom-domain-with-aspire `
    --resource-group rg-myappshared `
    --issuer https://token.actions.githubusercontent.com `
    --audience "api://AzureADTokenExchange" `
    --subject "repo:with-aspire/custom-domain-with-aspire:environment:test" `
    --name test

# Created federated credential for development
az identity federated-credential create `
    --identity-name msi-custom-domain-with-aspire `
    --resource-group rg-myappshared `
    --issuer https://token.actions.githubusercontent.com `
    --audience "api://AzureADTokenExchange" `
    --subject "repo:with-aspire/custom-domain-with-aspire:environment:development" `
    --name development
Add federated credentials to user managed identity.
We are almost there now we just need to set up the TXT records to support the initial environment deployments and modify the GitHub workflow to support deploying into target environments.
Setting up TXT records for multiple environments
Setting up TXT records for multiple environments is the same as setting up the first one, in fact if you are deploying to environments in the same subscription the value of the TXT record should be the same. In the example above I will need to create the following records:
asuid.myappprod:C640C1D541CEDBEC7FF92E534EBC9D47F28FA2B801476FC06799A76A96807F3Casuid.myapptest:C640C1D541CEDBEC7FF92E534EBC9D47F28FA2B801476FC06799A76A96807F3Casuid.myappdev:C640C1D541CEDBEC7FF92E534EBC9D47F28FA2B801476FC06799A76A96807F3C
As an aside - there is a way to know in advance what the value of the TXT record will be. The value of the TXT record is the result of a hash of the subscription ID that will host the container app and a special code. Here is a little C# script that will generate it for you.
// GenerateTxtRecord.cs
using System.Security.Cryptography;
using System.Text;

var hash = SHA256.Create();
string uniqueId = args[0] + "282EF";
var hashed = hash.ComputeHash(Encoding.UTF8.GetBytes(uniqueId));

var sb = new StringBuilder();

foreach (var b in hashed)
{
    sb.Append(b.ToString("X2"));
}

Console.WriteLine(sb.ToString());
C# program to generate asuid TXT record value
This is a great use case for the new dotnet run file.cs feature in .NET 10. Here is an example usage:
dotnet run .\GenerateTxtRecord.cs -- 5837e1bd-9167-4d3e-aed9-a8ec3da5f873When provisioning the container app environment one of the properties on the resource is also the domain verification ID so it's possible to get it a few different ways (note that the C# program above may not always work if the Azure team changes their TXT record generation logic which could happen at any time).
Workflow changes
We are nearly at a point where we can trigger the deployment across all three environments but before we can do that, we need to update the workflow to support deploying on top of environments - we've set the federated credentials up, so this is just about updating the workflow YAML files. First we want to rework the azure-dev.yml file in the .github/workflows directory:
# Run when commits are pushed to main
on:
  workflow_dispatch:
  push:
    # Run when commits are pushed to mainline branch (main or master)
    # Set this to the mainline branch you are using
    branches:
      - main

# Set up permissions for deploying with secretless Azure federated credentials
# https://learn.microsoft.com/en-us/azure/developer/github/connect-from-azure?tabs=azure-portal%2Clinux#set-up-azure-login-with-openid-connect-authentication
permissions:
  id-token: write
  contents: read

jobs:
  deploy-development:
    uses: ./.github/workflows/deploy.yml
    with:
      environment: development
  deploy-test:
    uses: ./.github/workflows/deploy.yml
    needs: deploy-development
    with:
      environment: test
  deploy-production:
    uses: ./.github/workflows/deploy.yml
    needs: deploy-test
    with:
      environment: production
.github/workflows/azure-dev.yml file
All of the actual deployment logic that was in this file was shifted into deploy.yml which contains the actual deployment steps.
on:
  workflow_call:
    inputs:
      environment:
        required: true
        type: string

jobs:
  deploy:
    runs-on: ubuntu-latest
    environment: ${{ inputs.environment }}
    env:
      AZURE_CLIENT_ID: ${{ vars.AZURE_CLIENT_ID }}
      AZURE_TENANT_ID: ${{ vars.AZURE_TENANT_ID }}
      AZURE_SUBSCRIPTION_ID: ${{ vars.AZURE_SUBSCRIPTION_ID }}
      AZURE_ENV_NAME: ${{ vars.AZURE_ENV_NAME }}
      AZURE_LOCATION: ${{ vars.AZURE_LOCATION }}
      AZURE_CERTIFICATE_NAME: ${{ vars.AZURE_CERTIFICATE_NAME }}
      AZURE_CUSTOM_DOMAIN: ${{ vars.AZURE_CUSTOM_DOMAIN }}
    steps:
      - name: Checkout
        uses: actions/checkout@v4
      - name: Install azd
        uses: Azure/setup-azd@v2
      - name: Setup .NET
        uses: actions/setup-dotnet@v4
        with:
          dotnet-version: |
            8.x.x
            9.x.x

      - name: Log in with Azure (Federated Credentials)
        run: |
          azd auth login `
            --client-id "$Env:AZURE_CLIENT_ID" `
            --federated-credential-provider "github" `
            --tenant-id "$Env:AZURE_TENANT_ID"
        shell: pwsh

      - name: Provision Infrastructure
        run: azd provision --no-prompt

      - name: Deploy Application
        run: azd deploy --no-prompt
.github/workflows/deploy.yml file
Go ahead and update your azure-dev.yml file and add the deploy.yml file and commit them to the repository and push them to GitHub. This will trigger the deployment pipeline (assuming you are pushing to master).
Normally if you had multiple environments that you were deploying to sequentially you would introduce deployment protection rules. I'm leaving that as an exercise for you to follow up on rather than add more to this already very log post 😄
Creating CNAME records and managed certificates
Just like our very first deployment from the local workstation we now need to setup the CNAME records so that we can trigger creation of the managed certificates in each of the three environments that were created.
To do that we need to get the fully qualified domain names of the webfrontend container apps in the three environments. Fortunately, the Azure CLI can help us get that information (alternatively you could go and dig around for the information in the portal).
az containerapp list `
    --query "[?name=='webfrontend'].{name:name, resourceGroup:resourceGroup, environmentId:properties.environmentId, fqdn:properties.configuration.ingress.fqdn}"
Azure CLI command to query all container app resources called webfrontend
[
  {
    "environmentId": "/subscriptions/5837e1bd-9167-4d3e-aed9-a8ec3da5f873/resourceGroups/rg-myapplocal/providers/Microsoft.App/managedEnvironments/env4cvc32i5jm2aq",
    "fqdn": "webfrontend.gentlewater-98804c98.westus3.azurecontainerapps.io",
    "name": "webfrontend",
    "resourceGroup": "rg-myapplocal"
  },
  {
    "environmentId": "/subscriptions/5837e1bd-9167-4d3e-aed9-a8ec3da5f873/resourceGroups/rg-development/providers/Microsoft.App/managedEnvironments/envddeoqkhtud4xg",
    "fqdn": "webfrontend.politeflower-d78127f9.westus3.azurecontainerapps.io",
    "name": "webfrontend",
    "resourceGroup": "rg-development"
  },
  {
    "environmentId": "/subscriptions/5837e1bd-9167-4d3e-aed9-a8ec3da5f873/resourceGroups/rg-test/providers/Microsoft.App/managedEnvironments/env7eaxkoqol7nmq",
    "fqdn": "webfrontend.mangoforest-1b51f6e8.westus3.azurecontainerapps.io",
    "name": "webfrontend",
    "resourceGroup": "rg-test"
  },
  {
    "environmentId": "/subscriptions/5837e1bd-9167-4d3e-aed9-a8ec3da5f873/resourceGroups/rg-production/providers/Microsoft.App/managedEnvironments/env4bvlezf5kjibc",
    "fqdn": "webfrontend.wittyisland-79873f1e.westus3.azurecontainerapps.io",
    "name": "webfrontend",
    "resourceGroup": "rg-production"
  }
]
Output from Azure CLI command querying container app resources.
With this information we can go and create all the CNAME records in the DNS zone file (manually) as well as issuing the commands we need to trigger the creation of the certificates in each environment:
# Trigger certificate creation
az containerapp env certificate create `
    --name env4bvlezf5kjibc `
    --resource-group rg-production `
    --validation-method CNAME `
    --hostname myappprod.withaspire.dev

az containerapp env certificate create `
    --name env7eaxkoqol7nmq `
    --resource-group rg-test `
    --validation-method CNAME `
    --hostname myapptest.withaspire.dev

az containerapp env certificate create `
    --name envddeoqkhtud4xg `
    --resource-group rg-development `
    --validation-method CNAME `
    --hostname myappdev.withaspire.dev
Azure CLI commands to trigger managed certificate creation in each environment.
The output from these commands will show the name of the certificate for each environment which can then be fed into a GitHub CLI command to (finally!) set the AZURE_CERTIFICATE_NAME environment variable for each environment.
gh variable set `
    AZURE_CERTIFICATE_NAME `
    --env production `
    --body "mc-rg-production-myappprod-withas-1389" `
    --repo with-aspire/custom-domain-with-aspire

gh variable set `
    AZURE_CERTIFICATE_NAME `
    --env test `
    --body "mc-rg-test-myapptest-withas-1054" `
    --repo with-aspire/custom-domain-with-aspire

gh variable set `
    AZURE_CERTIFICATE_NAME `
    --env development `
    --body "mc-rg-development-myappdev-withasp-4970" `
    --repo with-aspire/custom-domain-with-aspire
GitHub CLI command to set certificate variable in each GH environment.
The grand finale
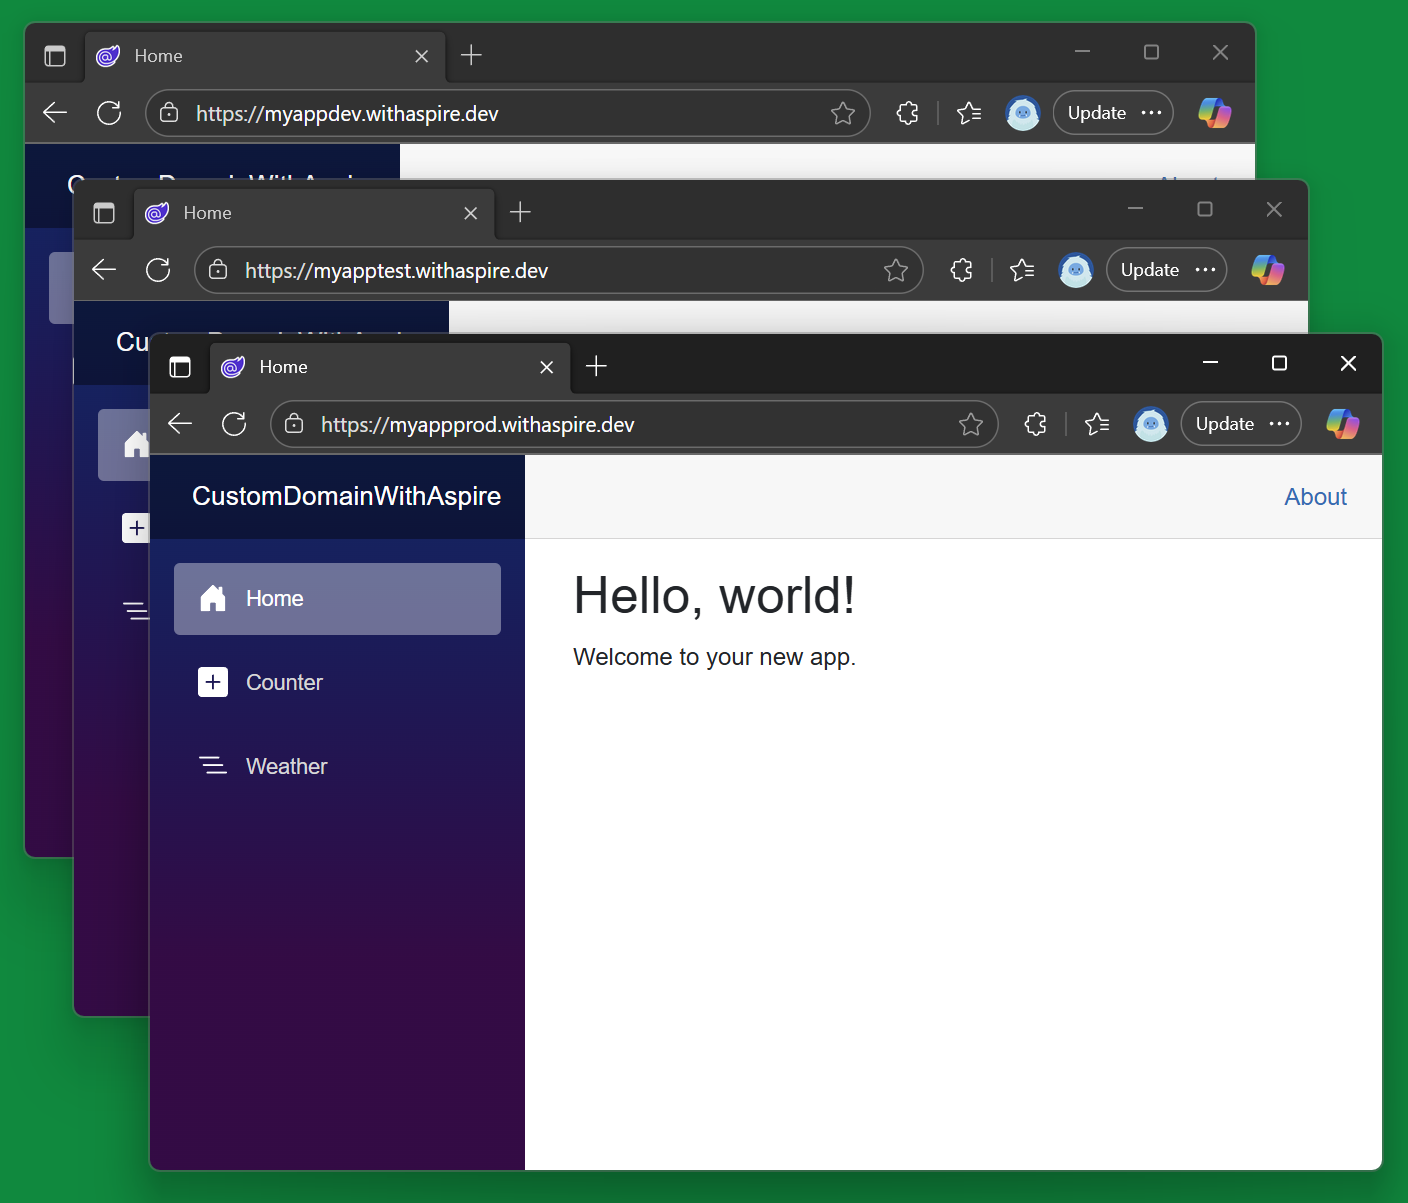
We are just about done. The last thing that we need to do now that all the necessary configuration is done is trigger another deployment which will update all of the webfrontend resources in each environment and trigger the association of the managed certificates with the custom domains in the container apps. Once that is done each environment will have a container app live on a custom domain!
The second full environment deployment should take significantly less time because it only needs to verify that the underlying Azure infrastructure has not changed before it updates each of the container apps with a new build.
Once it is done ... ta-da!
In this post I've walked through creating an Aspire app from scratch, configuring it to use custom domains and deploying it first from my local workstation, then from a GitHub Action. After that up levelled up the GitHub Action deployment to support deploying to multiple environments.
Notice that I did not modify the AppHost.cs file after I added the initial parameters and configuration for Azure Container Apps. This allows us to dynamically expand the number of environments we deploy to in the future.
From here you could easily come up with an approach where every new PR into a code-base spins up a new environment for testing and is torn down after some period of time (or when the PR is closed).